上回说到,Wordpress配合 Nginx FastCGI Cache缓存可以极大提升速度体验,但钻芒博客由于是通过Nginx反向代理所以使用起来纯在一定兼容问题,比如缓存无法刷新,缓存状态码换乱,私密文章前台也缓存了等等问题,通过测试,配合Redis缓存完美解决。猜测可能是文件配置在源服务器和代理服务器的Nginx中产生冲突,而Redis则不会。
教程开始:
和FastCGI缓存部署方法类似,在相应站点等配置文件内插入缓存位置信息和缓存配置信息即可。
以下教程配合宝塔面板使用,技术控部署逻辑同理。
第一步,配置服务器环境
1.1 安装Nginx OpenResty
为什么要用Nginx OpenResty?因为使用Redis cache缓存,需要给nginx配置四个模块:
srcache-nginx-module
redis2-nginx-module
HttpRedisModule
set-misc-nginx-module
OpenResty 介绍:
- OpenResty(又称:ngx_openresty) 是一个基于 NGINX 的可伸缩的 Web 平台,由中国人章亦春发起,提供了很多高质量的第三方模块。
- OpenResty 是一个强大的 Web 应用服务器,Web 开发人员可以使用 Lua 脚本语言调动 Nginx 支持的各种 C 以及 Lua 模块,更主要的是在性能方面,OpenResty可以 快速构造出足以胜任 10K 以上并发连接响应的超高性能 Web 应用系统。
- 360,UPYUN,阿里云,新浪,腾讯网,去哪儿网,酷狗音乐等都是 OpenResty 的深度用户。
因为宝塔的nginx openresty 默认集成了上边4个模块,所以我们没有别的因素影响直接切换到nginx openresty 即可。

你可以用下边的命令查看当前Nginx是否安装了这几个模块。
nginx -V 2>&1 | grep 'srcache-nginx-module\|redis2-nginx-module\|redis-nginx-module\|set-misc-nginx-module' -o
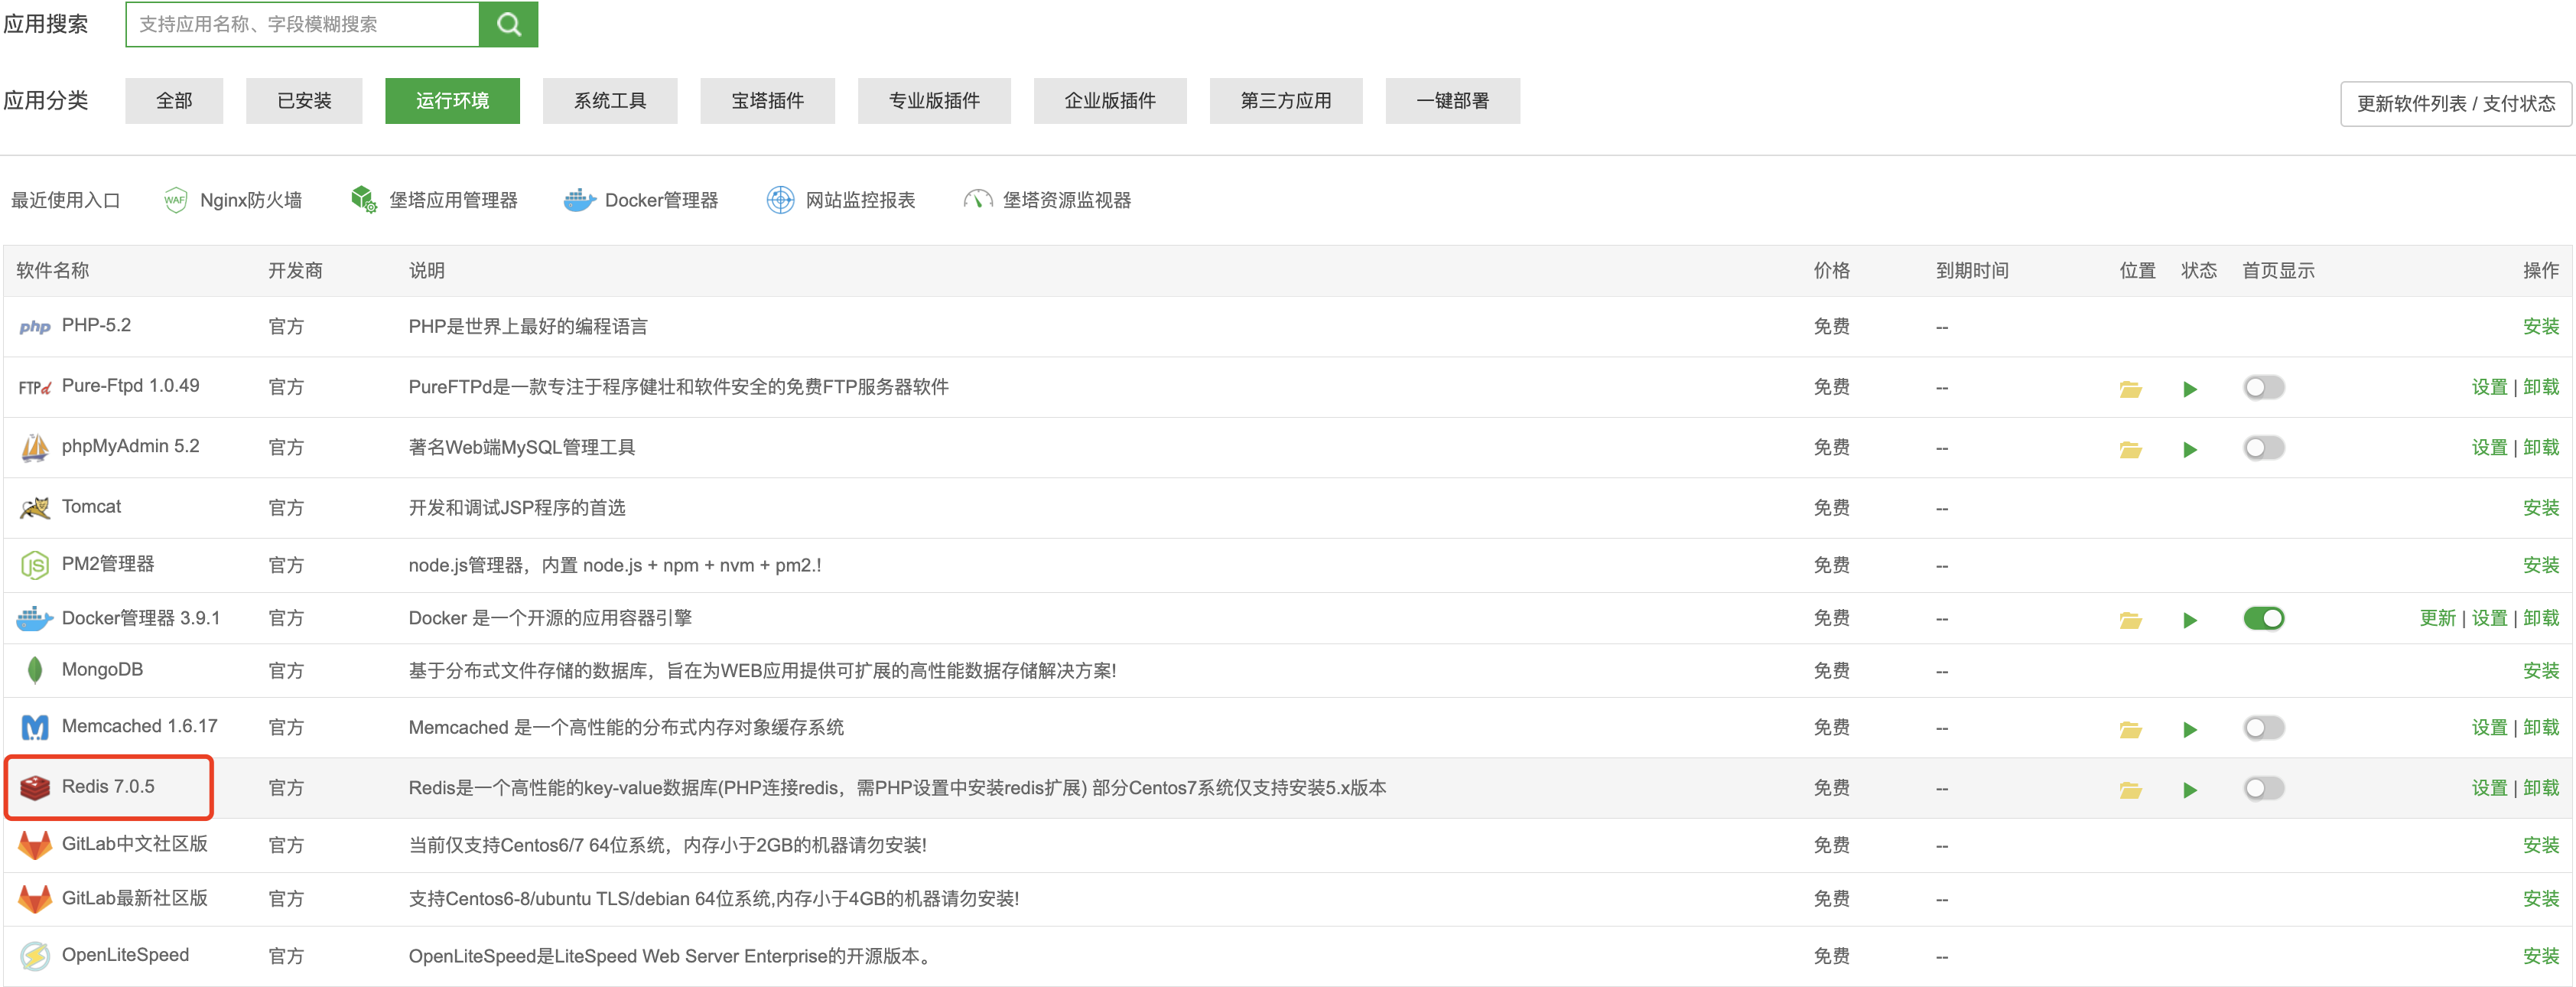
1.2安装Redis

第二步,配置站点信息
2.1 开启Redis缓存
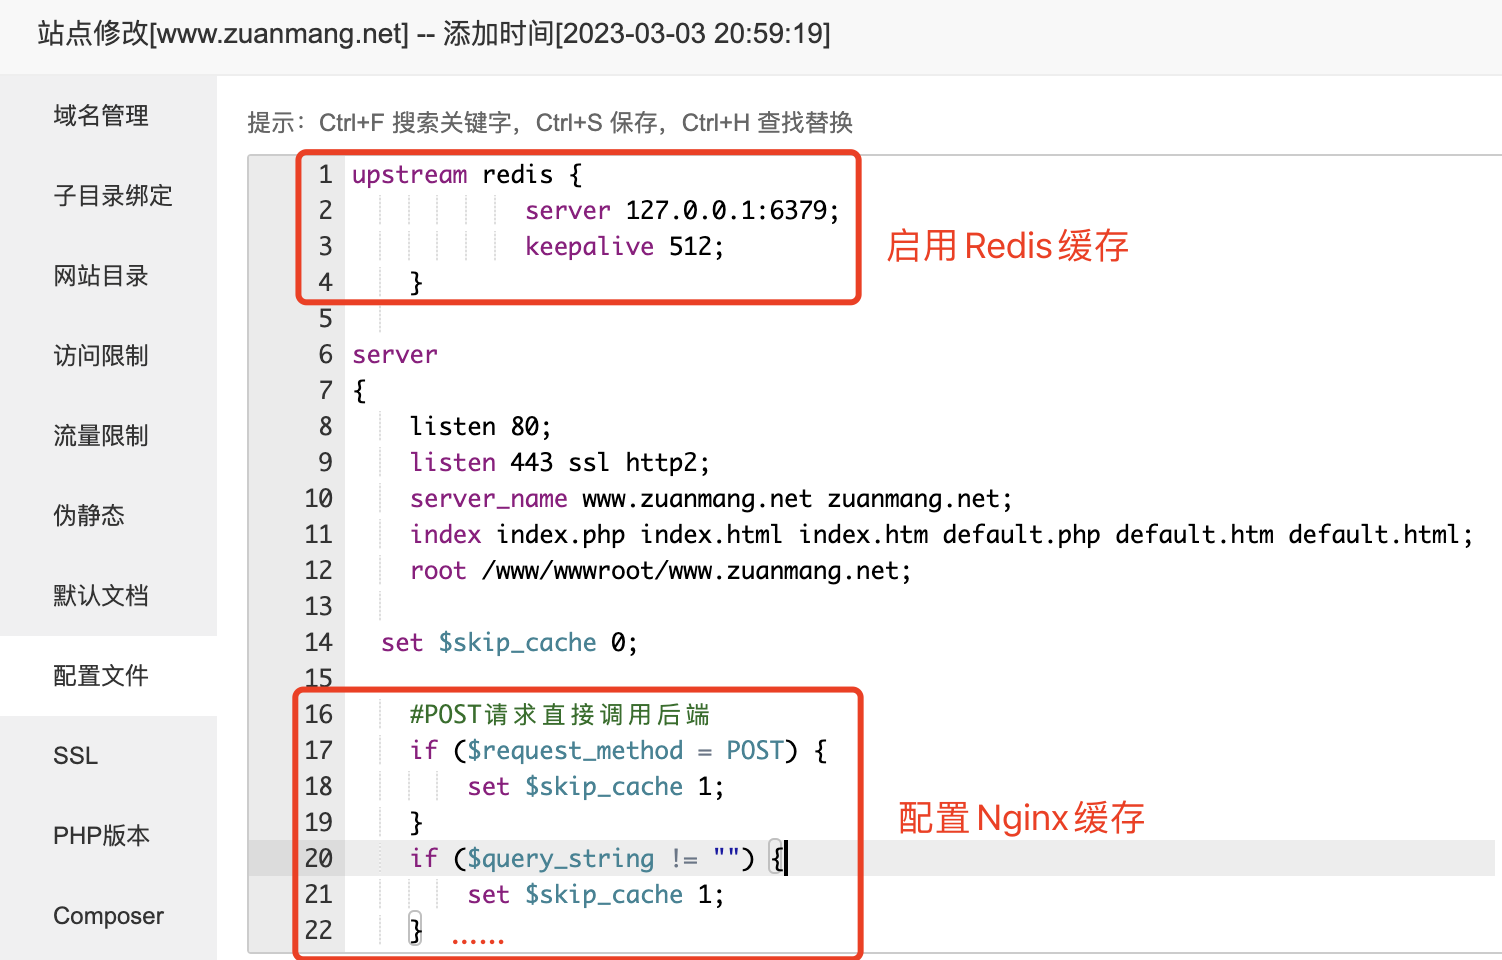
打开网站 配置文件,在service上方插入如下代码,启用redis缓存:
upstream redis {
            server 127.0.0.1:6379;
            keepalive 512;
    }
插入位置如图:(下边教程的 插入配置缓存 插入位置也在这张图里)

2.2 插入配置缓存
set $skip_cache 0;

    #POST请求直接调用后端
    if ($request_method = POST) {
        set $skip_cache 1;
    }
    if ($query_string != "") {
        set $skip_cache 1;
    }

###下边的'后台等特定页面不缓存'二选一,删除不符合你的,避免报错。
      #通用--后台等特定页面不缓存(其他需求请自行添加即可)
        if ($request_uri ~* "/wp-admin/|/xmlrpc.php|wp-.*.php|/feed/|index.php|sitemap(_index)?.xml") {
            set $skip_cache 1;
        }

     #7B2主题专用---后台等特定页面不缓存(其他需求请自行添加即可)
        # if ($request_uri ~* "/wp-admin/|/wp-admin/*|/wp-json/*|/xmlrpc.php|wp-.*.php|/feed|/rss|/pay|/notify|/return|/download|/redirect|index.php|sitemap.xml|sitemap(_index)?.xml|sitemap.*.xml|sitemap.*.*.xml") {
            # set $skip_cache 1;
         #}

    #不缓存登陆用户和最近评论的用户
     if ($http_cookie ~* "comment_author|wordpress_[a-f0-9]+|wp-postpass|wordpress_no_cache|wordpress_logged_in") {
            set $skip_cache 1;
        }

   location /redis-fetch {
        internal  ;
        set  $redis_key $args;
        redis_pass  redis;
    }

    location /redis-store {
        internal  ;
        set_unescape_uri $key $arg_key ;
        redis2_query set $key $echo_request_body;
        redis2_query expire $key 14400;
        redis2_pass  redis;
    }


     location ~ [^/]\.php(/|$){
        set $key "nginx-cache:$scheme$request_method$host$request_uri";
        try_files $uri =404;


        srcache_fetch_skip $skip_cache;
        srcache_store_skip $skip_cache;

        srcache_response_cache_control off;

        set_escape_uri $escaped_key $key;

        srcache_fetch GET /redis-fetch $key;
        srcache_store PUT /redis-store key=$escaped_key;

        more_set_headers 'X-Cache $srcache_fetch_status';
        more_set_headers 'X-Store $srcache_store_status';
        add_header X-Cache "$srcache_fetch_status From $host";
        add_header X-Frame-Options SAMEORIGIN; # 只允许本站用 frame 来嵌套
        add_header X-Content-Type-Options nosniff; # 禁止嗅探文件类型
        add_header X-XSS-Protection "1; mode=block"; # XSS 保护

        fastcgi_pass unix:/tmp/php-cgi-81.sock;
        #81代表php8.1  修改成你站点使用的
        #上边这行php版本不一样请注意修改
        fastcgi_index index.php;
        include fastcgi.conf;
    }
2.3 配置插件
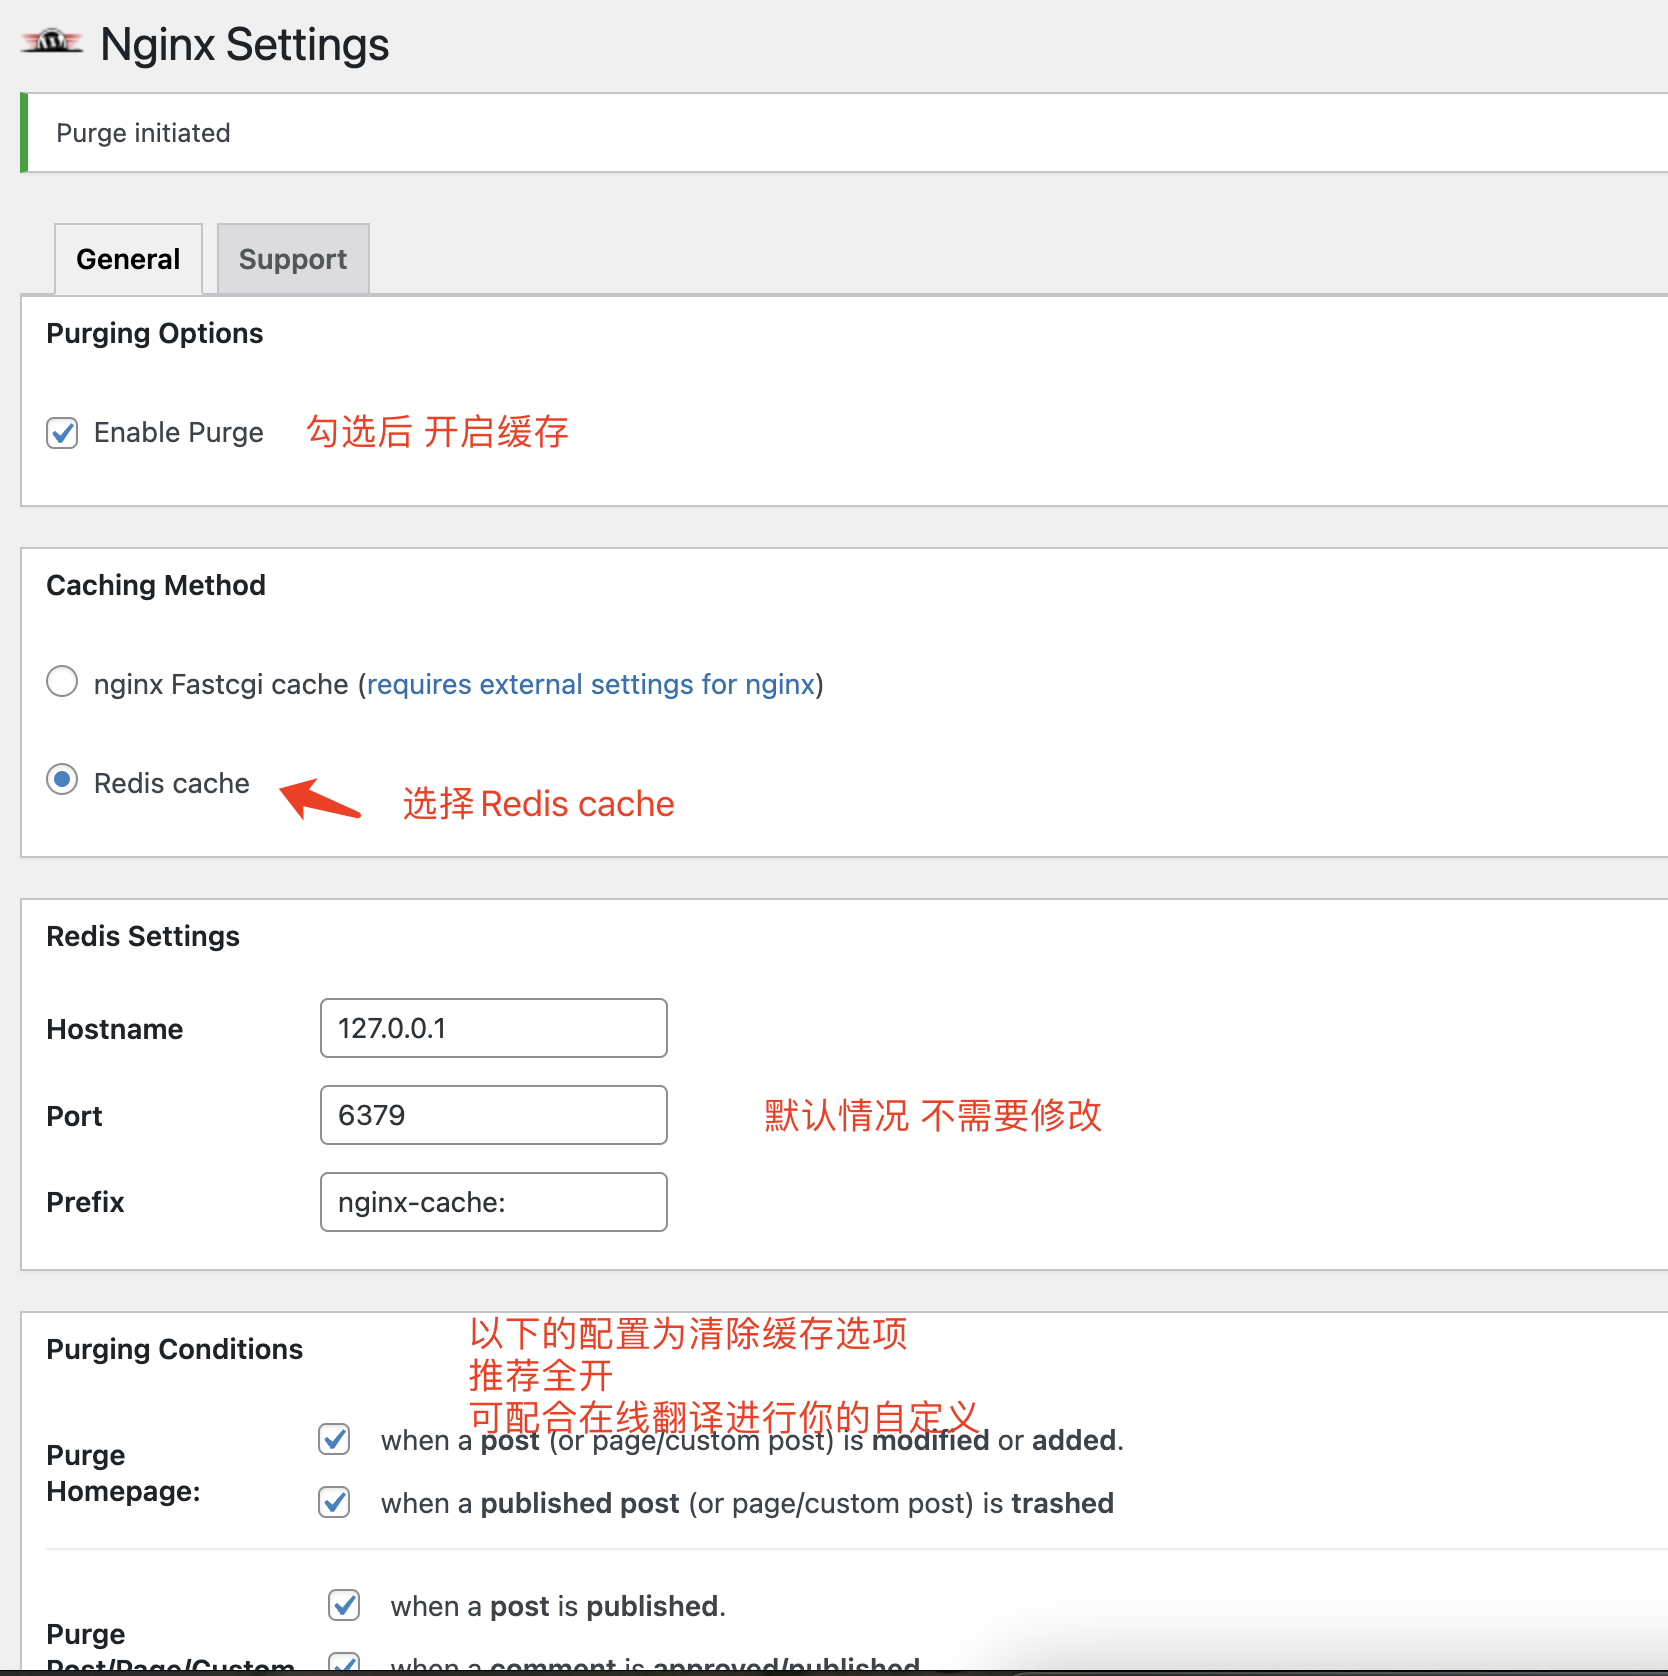
WordPress后台下载nginx-help插件
在第二个Caching Method选项选择Redis cache缓存

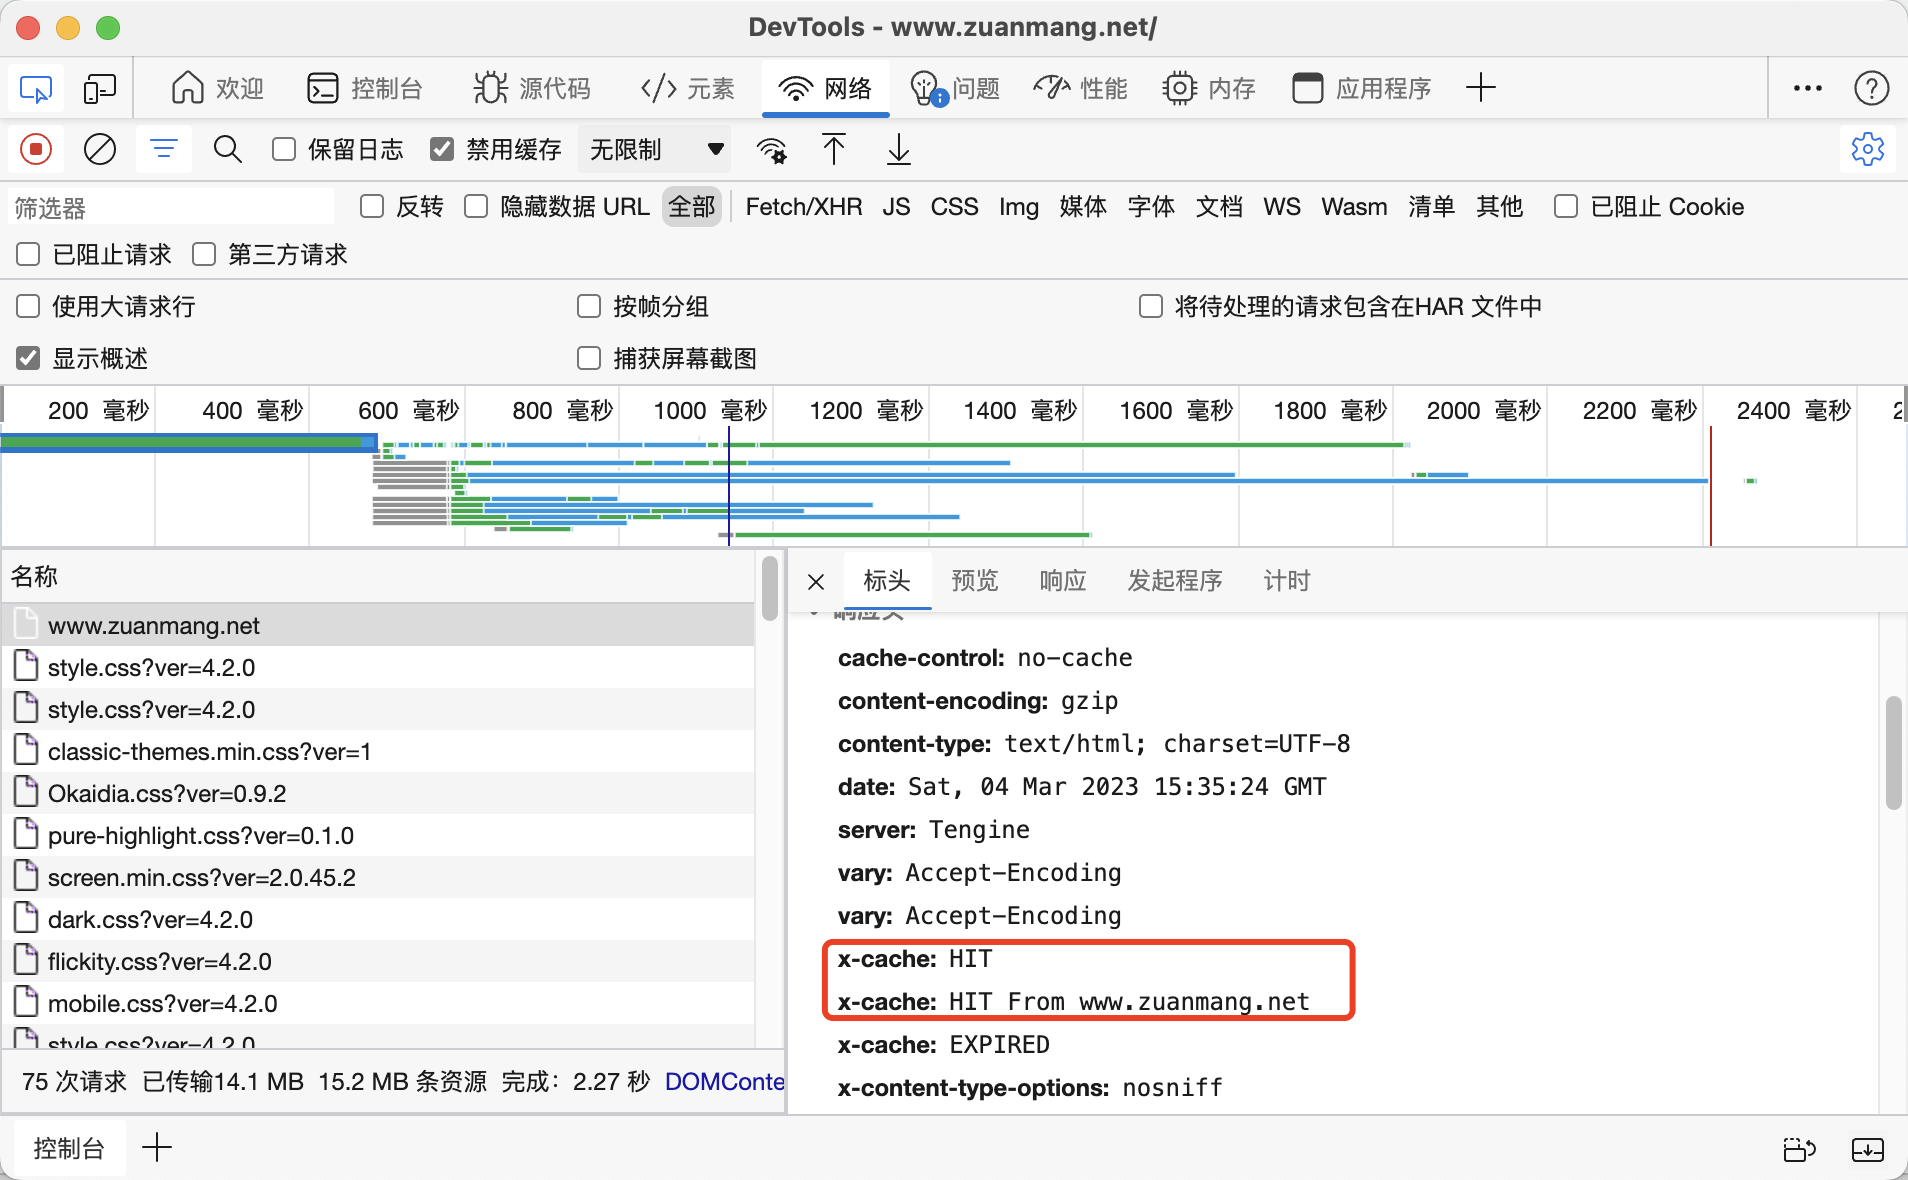
配置完成,预览效果

刷新缓存
如果出现发布或修改文章无法刷新缓存,可以后台安装Redis Object Cache这个插件配合刷新。(钻芒发现不使用这个插件也能自动刷新缓存,因转载来源大鸟博客推荐使用这个款插件,这里分享也提到一下,避免某些同学刷新缓存无果)
相关链接
宝塔面板WordPress – 用Nginx+Redis Cache缓存提速网站 – 大鸟博客 (daniao.org)
© 版权声明
THE END


![Time相册主题 for Typecho模板 [2020年2月12日更新至V1.1.2 支持懒加载]-钻芒博客](https://60yu.w4i.cn/wp-content/uploads/2019/11/20200903220529436.png)


暂无评论内容